The essential guide to making trail foods for when you bug out
Tuesday, August 06, 2019 by Mary Miller
http://www.naturalnewsrecipes.com/2019-08-06-guide-to-making-trail-foods-for-when-you-bug-out.html

Bugging out isn’t a simple picnic in the great outdoors. The food you will bring will have a significant impact on your overall experience. It must be packed with nutrients to help you keep your strength up, but lightweight at the same time so as not to weigh you down. And since you won’t be bringing your refrigerator with you, your food supply needs to be able to stay fresh for a long time without refrigeration. To learn how to make trail foods that meet these requirements, follow this simple guide. (h/t to PreppersWill.com)
How to make your own jerky
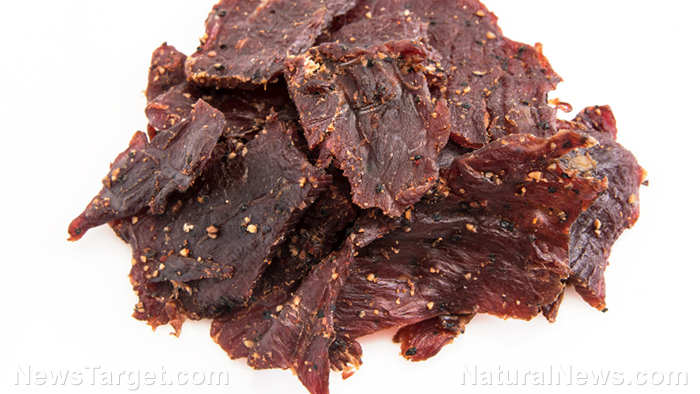
Jerky can be made from venison, elk, or buffalo meat, but the best kind of jerky is made using beef brisket. To make beef jerky, begin by trimming the fat and gristle off of your beef brisket. Fat does not dry out and will eventually turn rancid. Next, you should cut your beef brisket into strips that are four to five inches long and one-fourth of an inch wide. Jerky is basically dried meat so you will want nice, thin strips that dry quickly. Beef jerky will also be very tough. If you want jerky that is easier to chew, try cutting the beef against the grain so that it breaks apart more easily. If you want your beef jerky to have a little flavor, you can marinate your beef using a vinegar-based marinade or a mixture of two tablespoons of soy sauce, two drops of Tabasco sauce, one-fourth teaspoon of salt, a dash of ground pepper, and a minced clove of garlic.
Place your beef and marinade in a ziplock bag and leave the bag inside your refrigerator overnight. Once properly marinated, drain the beef and place it on your oven racks. Set your oven to 140 F and leave the oven door partially open to allow moisture to escape. Allow the beef to dry for six to eight hours. You will know that your beef jerky is ready because it will turn dark and brittle. Allow it to cool in your oven before removing it and letting it dehydrate further in the open. Properly dried beef jerky will last for several months. (Related: Not all survival foods are equally good: Here are foods you should consider for when it all hits the fan.)
How to make your own pemmican
First created by Native American women, this nutritious survival food is a combination of fruits, lean meat, animal fat, and salt. Pemmican is traditionally made using bison, moose, dear, or elk meat, but nearly any other type of meat can be used, including fish. What makes pemmican different from jerky is it contains both lean meat and animal fat. In fact, its name comes from the word “pimii,” the Cree-Chippewa word for fat. Pemmican creates little food waste and provides more nutrition than jerky.
To create your own pemmican, grind your lean meat using a meat grinder or cut it into thin slices. Spread the meat evenly over aluminum foil on a cookie tray and place it inside the oven. Set your oven to 180 F and allow your meat to dry for six to eight hours. If you want your meat to mix well with the other ingredients, you can grind it into a fine powder using an electric blender or pound it with a mortar and pestle.
Next, choose your favorite fruits or berries and dry them the same way you dried the meat. Once fully dried, the fruits should be cut into thin slices but not ground into a powder. Mix together equal parts of the dried meat and fruit. Use your best judgment when adding salt to taste. While adding more salt can improve your pemmican’s shelf life, too much salt can also undermine its health benefits. Melt your desired animal fat then add it to your dried meat and fruit mixture. The amount of fat should be at an equal ratio to your meat. Mix everything thoroughly. Once the ingredients are evenly combined, spread the pemmican out in a thin layer and allow it to cool and harden.
Jerky and pemmican are high-energy, long-lasting trail foods that can keep you going even when SHTF.
Sources include:
Tagged Under: Tags: bugging out, emergencies, emergency food, food prep, homesteading, jerky, nutrition, off grid, outdoors, pemmican, preparedness, prepper, prepping, prepping tips, self-reliance, SHTF, survival, survival food, survivalist, trail foods, wilderness


